 Workflow for Designers
Update: Sara Soueidan has written a much better article for creating and exporting SVGs for the web. Thanks Sara!
I’m currently working on no shortage of responsive projects, all of which have great need for resolution-independent imagery. Since all the cool kids are going the SVG route, I figured I’d try my hand at it too. I seem to have arrived at a decent workflow for creating quick vector assets with really small file sizes. If anything, I’m just writing this down so I can remember it for next time.
A few quick notes
- I’m just focusing on the asset creation here and not details about implementation on either front- or back-end.
- I still do Photoshop comps, so the majority of my workflow centers around Photoshop visualization of elements and/or screens.
- There are a ton of great solutions that can automate this for you. However, if you’re anything like me, some of them may seem either overly complex or feel like a black box, or both. The workflow I describe below is mostly born of my desire to be anal-retentive about asset creation. Hmph.
As an example, let’s try and create the ever-popular social media navigation bar. However, you decide to do it—I assemble mine in Photoshop—my comp looks something like this:

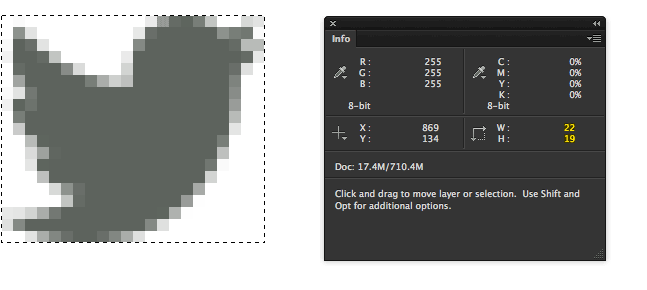
I’ll then go through an measure the size of each icon in Photoshop by using the marquee tool wih the Info palette to get the actual pixel dimensions (shown zoomed in at 1200%):
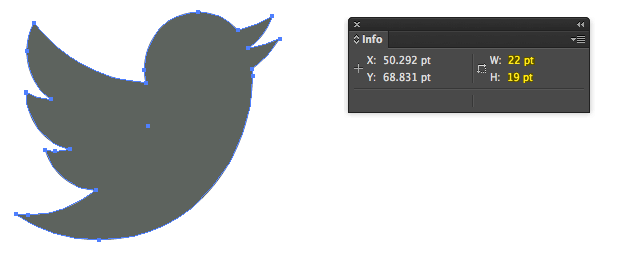
I’ll then jump into Illustrator and create my vector graphic at that exact size:
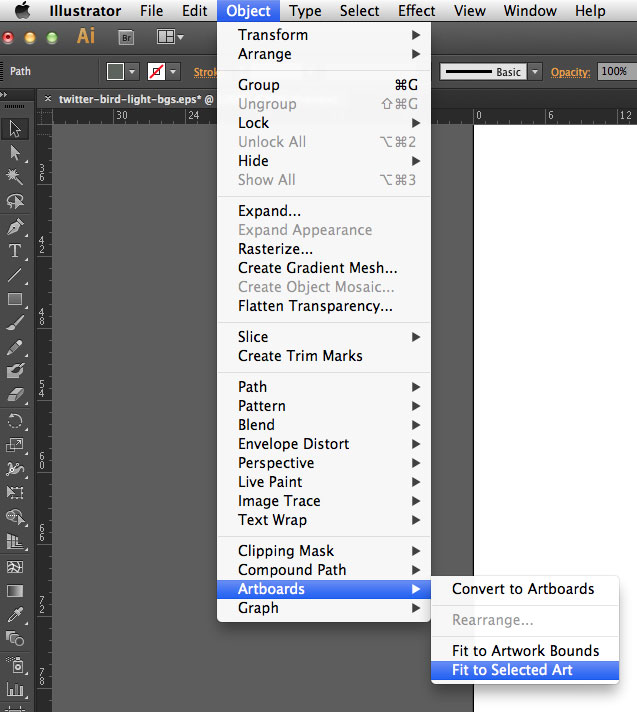
I’ll make my document size the exact size of the graphic by choosing Object > Artboards > Fit to Selected Art.
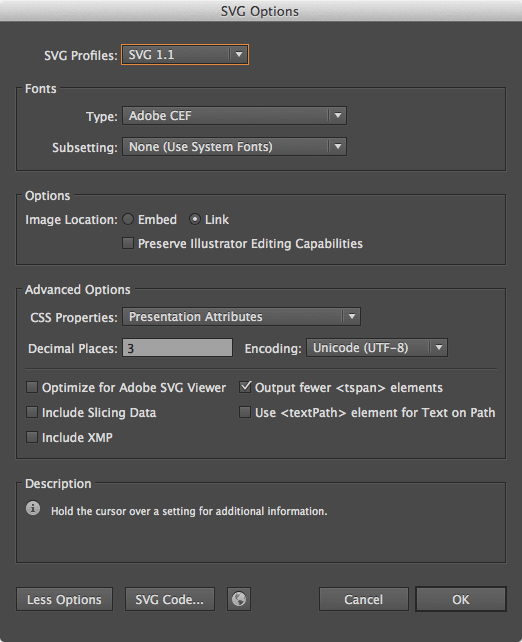
From here, File > Save As... and choose “SVG” as the Format.
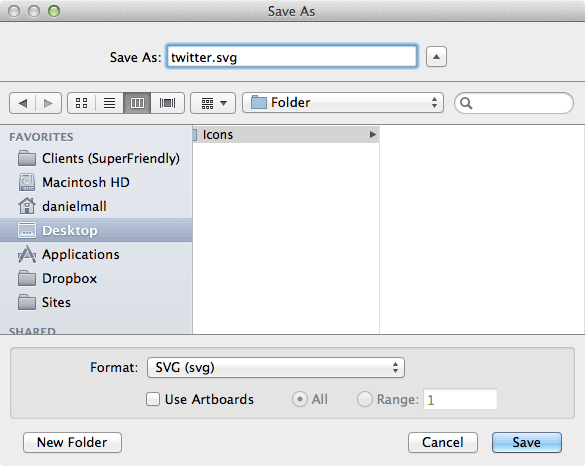
Keep the default options checked.
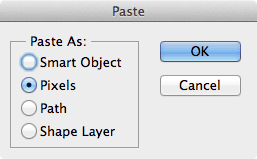
You’re going to have to create fallback PNG graphics, so now is a good time to do that. In Illustrator, Select > All and then Edit > Copy to copy the shape to your clipboard.
Switch back to Photoshop and choose File > New…. Photoshop will assume the new dimensions of the new file to be the dimensions of the shape in your clipboard, so just double check that those are the same dimensions of your vector shape.

Choose Edit > Paste. When the dialog box appears, choose “Pixels.”
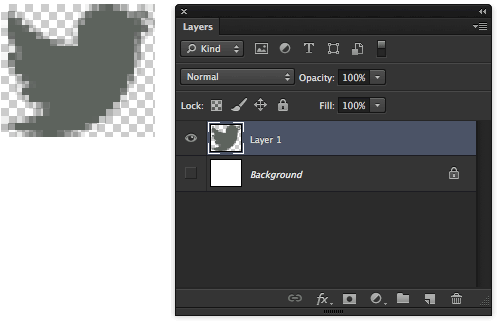
Disable the visibility of the Background layer.
Choose File > Save for Web.... Choose the PNG-24 Preset and make sure “Transparency” is enabled.
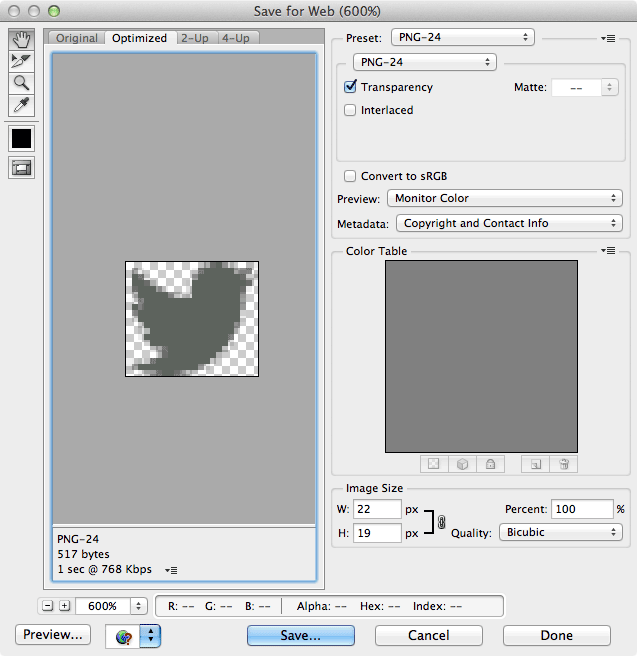
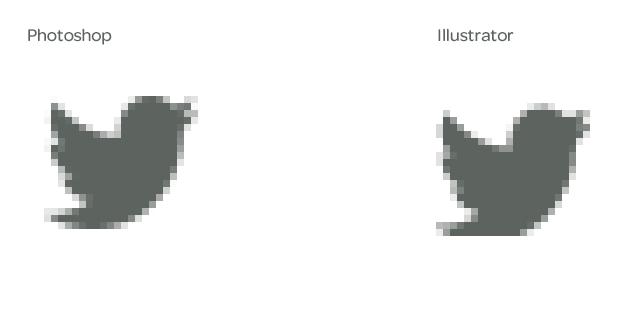
Edit: in the comments below, Jamie Reynolds mentions generating the PNG from Illustrator as opposed to Photoshop. However, I’ve noticed a difference between the output; I find that Illustrator doesn’t do as well as Photoshop does with the aliasing. Check out the bottom row of pixels here; Illustrator makes some poorer choices for clarity, hence my desire to add one more step to generate a better graphic.
You should now have 2 raw files: an SVG and a PNG.
Time to optimize. If you don’t already have them, download and install ImageAlpha and ImageOptim. Open ImageAlpha and drag your PNG into the window.
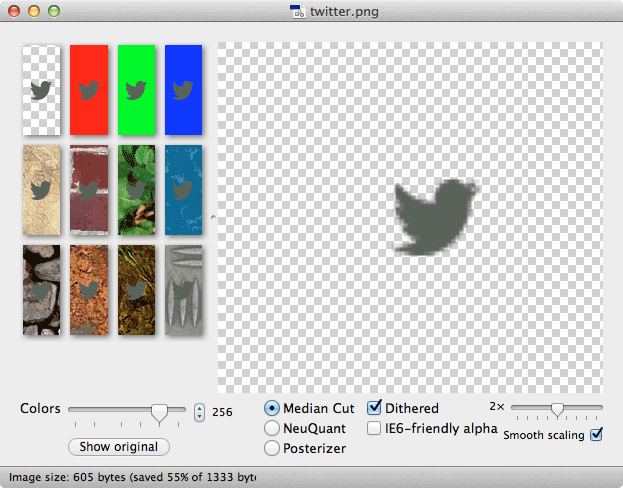
Choose File > Save As... and make sure “Optimize with ImageOptim” is enabled. Decide whether you want to overwrite your image or create a new one. Choose Save.
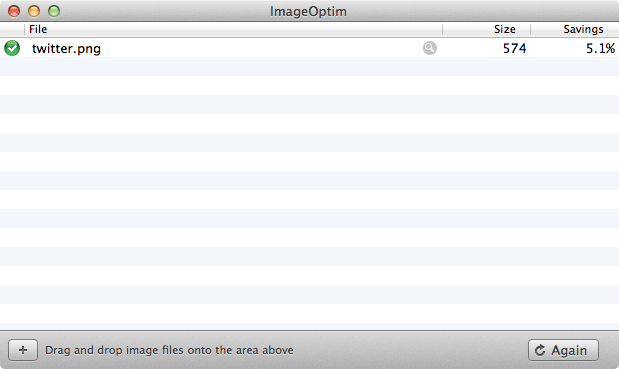
If ImageOptim isn’t open, this will launch ImageOptim. You’ll see that our original file size of 1KB has been reduced to 574 bytes. Huzzah! Let’s do this for our SVG as well.
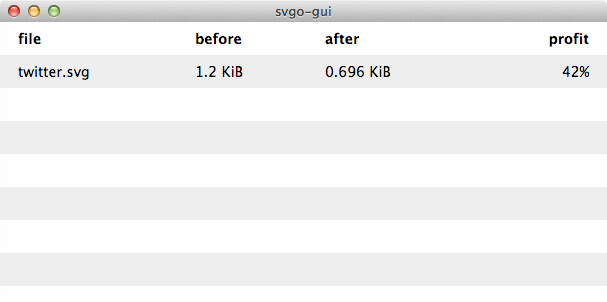
Lucky for us, there are some really smart people out there that make our jobs easy. Check out SVGO, a great command line tool for optimizing SVGs. If you’re not into command line, there’s also a GUI called SVGO GUI. That’s my weapon of choice.
Just like ImageAlpha, crack open SVGO GUI and drag your SVG file in. Warning: this will automatically process your file, so if you still want to preserve your original, duplicate it before dragging into SVGO GUI. Voilà! Our 1KB SVG dropped down to 713 bytes.
And there you have it: a manual workflow for designers to create optimized SVGs and PNGs. Enjoy!
Article Info